Chapter 14: The Scene Editor
Combine several edited Cuts timelines into one finished video: arrange the storyboard, add transitions, layer images and music, and export an MP4.
Chapter 14: The Scene Editor
14.1 What is a scene?
- A Cuts timeline: one edited version of one video (Chapter 13).
- A scene: several Cuts timelines joined together into one finished video. For example "intro + interview A + interview B + outro".
Each part keeps its own edits inside the scene (subtitles, mosaics and zooms are all still there). If you go back and change that part later, the scene updates too.
💡 Deleting a scene doesn't delete the timelines it uses, but a timeline that a scene is using can't be deleted.
14.2 Create a scene
- First edit each video you want to use in the Timeline Editor and click Apply & Save.
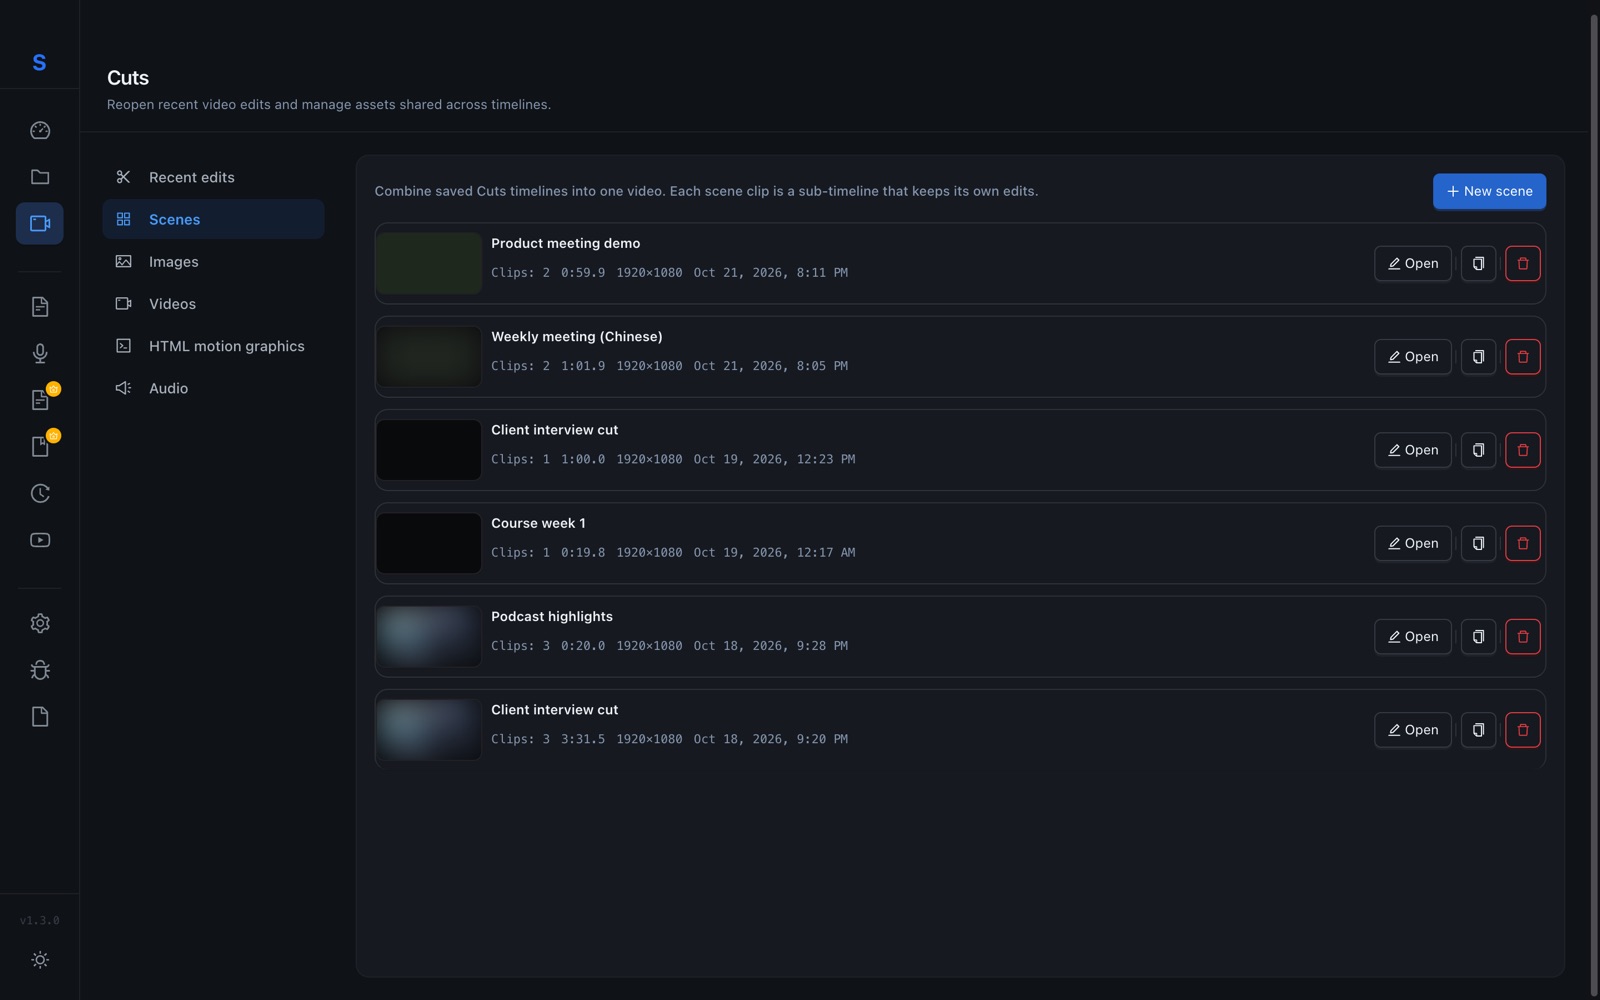
- In the left menu go to Cuts › Scenes and click New scene.
- Type a scene name and choose the shape of the picture: 16:9 (horizontal), 9:16 (vertical, for Reels / Shorts), 1:1 (square) or 4:3. Click Create.
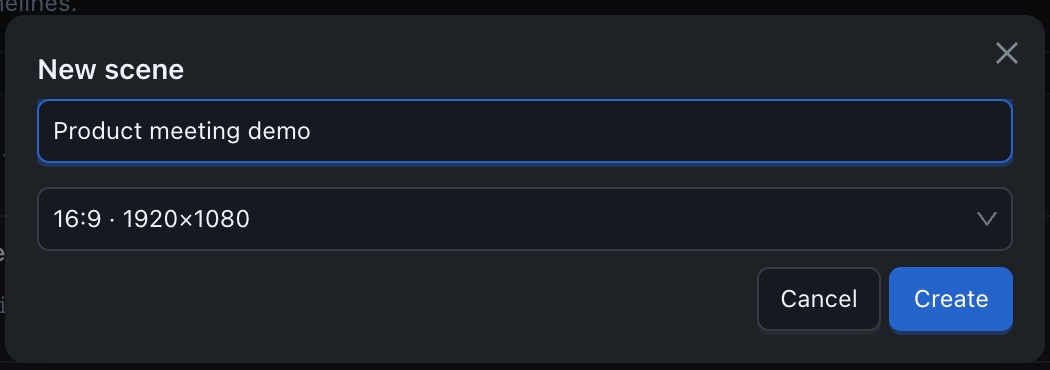
The Scene Editor opens straight away. To edit it again later, click Open in the scene list.
14.3 Finding your way around
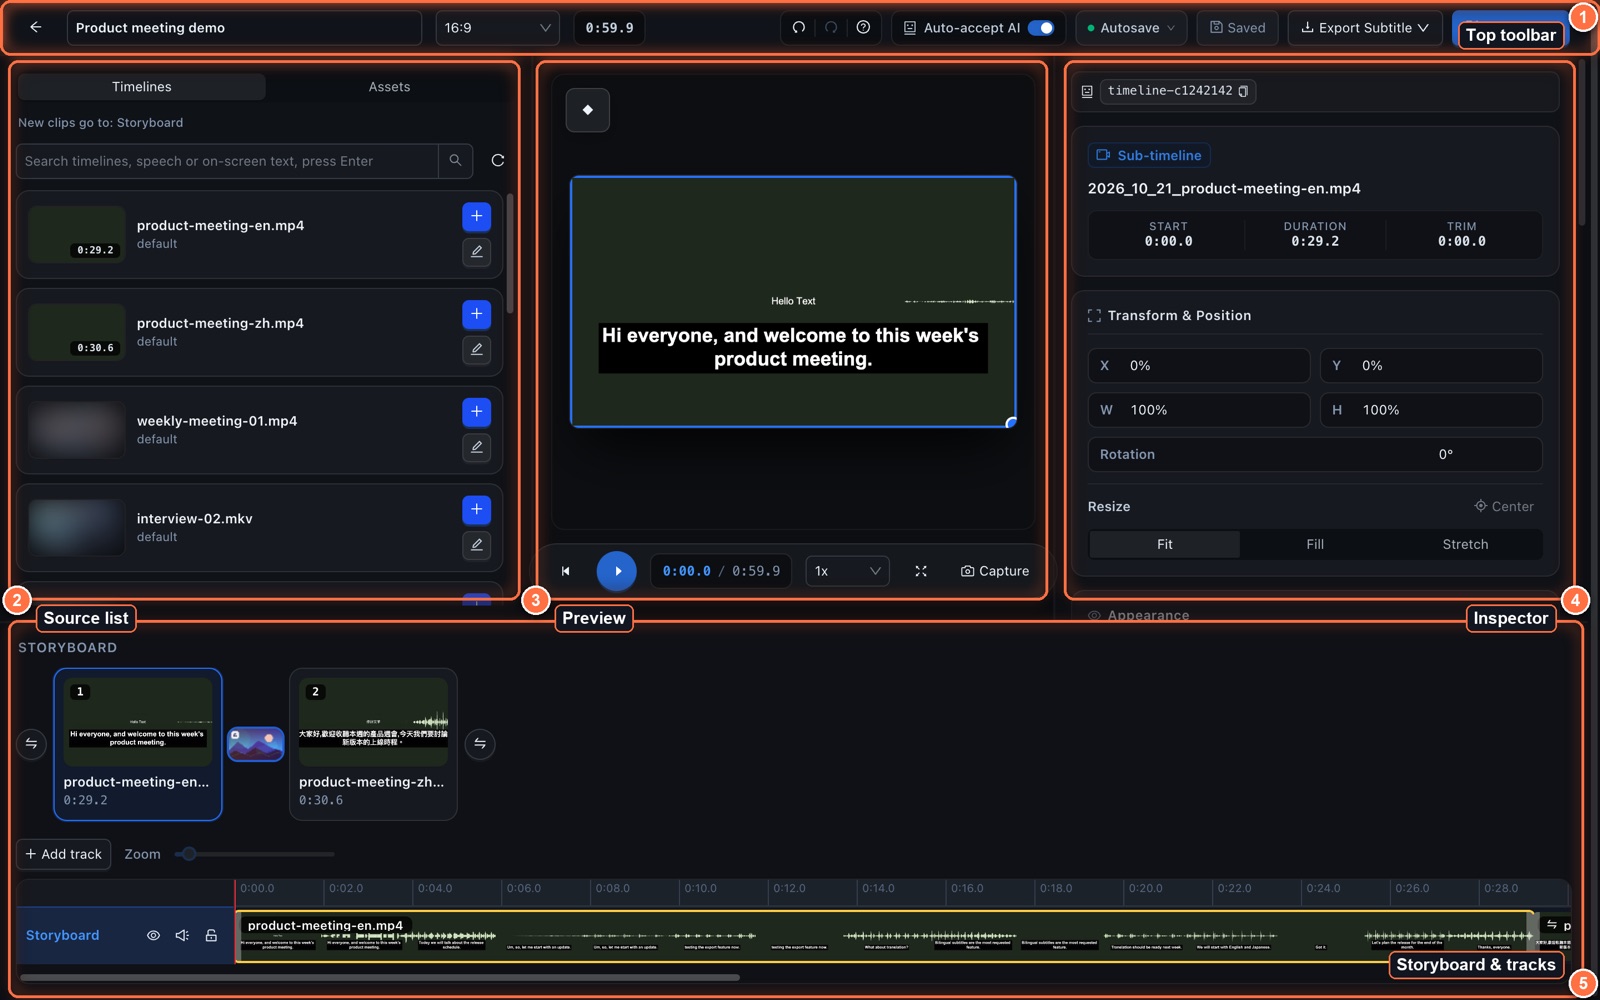
- Top toolbar: back, scene name, aspect ratio, total length, undo / redo, shortcuts (?), Auto-accept AI (only needed with outside AI tools; see Chapter 13, section 13.1), Autosave, save, Export Subtitle and Export MP4.
- Source list: two tabs, Timelines (the Cuts edits you've saved) and Assets (images, videos, music and motion graphics).
- Preview: you can drag things on the picture directly, and Capture takes a screenshot for an AI assistant.
- Inspector: adjust the selected clip. With nothing selected it shows the scene settings (size and background color).
- Storyboard & tracks: the Storyboard is the order of the clips, and the tracks are for layering images and music.
(The orange numbers in the picture match 1–5.)
You can drag the dividers between the panels to resize them.
14.4 Arrange the clips: the storyboard
- In the Timelines tab on the left, click the blue + next to a timeline. It's added to the end of the storyboard.
- New clips go to: Storyboard at the top shows which track new clips are added to. Click a track name below to switch.
- The pencil icon opens that timeline for editing; when you save, you come back to the scene.
- In the Storyboard at the bottom, drag the cards to change their order. Click once to select a card, or double-click to edit it.
14.5 Add transitions
There's a small button between the storyboard cards, one before the first card and one after the last:
- The button between two cards sets the transition between those two clips.
- The button before the first card sets the Fade in at the start of the video; the button after the last card sets the Fade out at the end.
- Click a button.
- Move your mouse over an effect thumbnail to preview it, then click to apply it.
- Adjust the Transition length (0.1 to 5 seconds) and the Easing (how the speed of the transition changes: Linear = steady, Ease in = gets faster, Ease out = gets slower, Smooth = slow, then faster, then slow again; if unsure, keep the default Smooth).
- To get rid of it, click Remove.
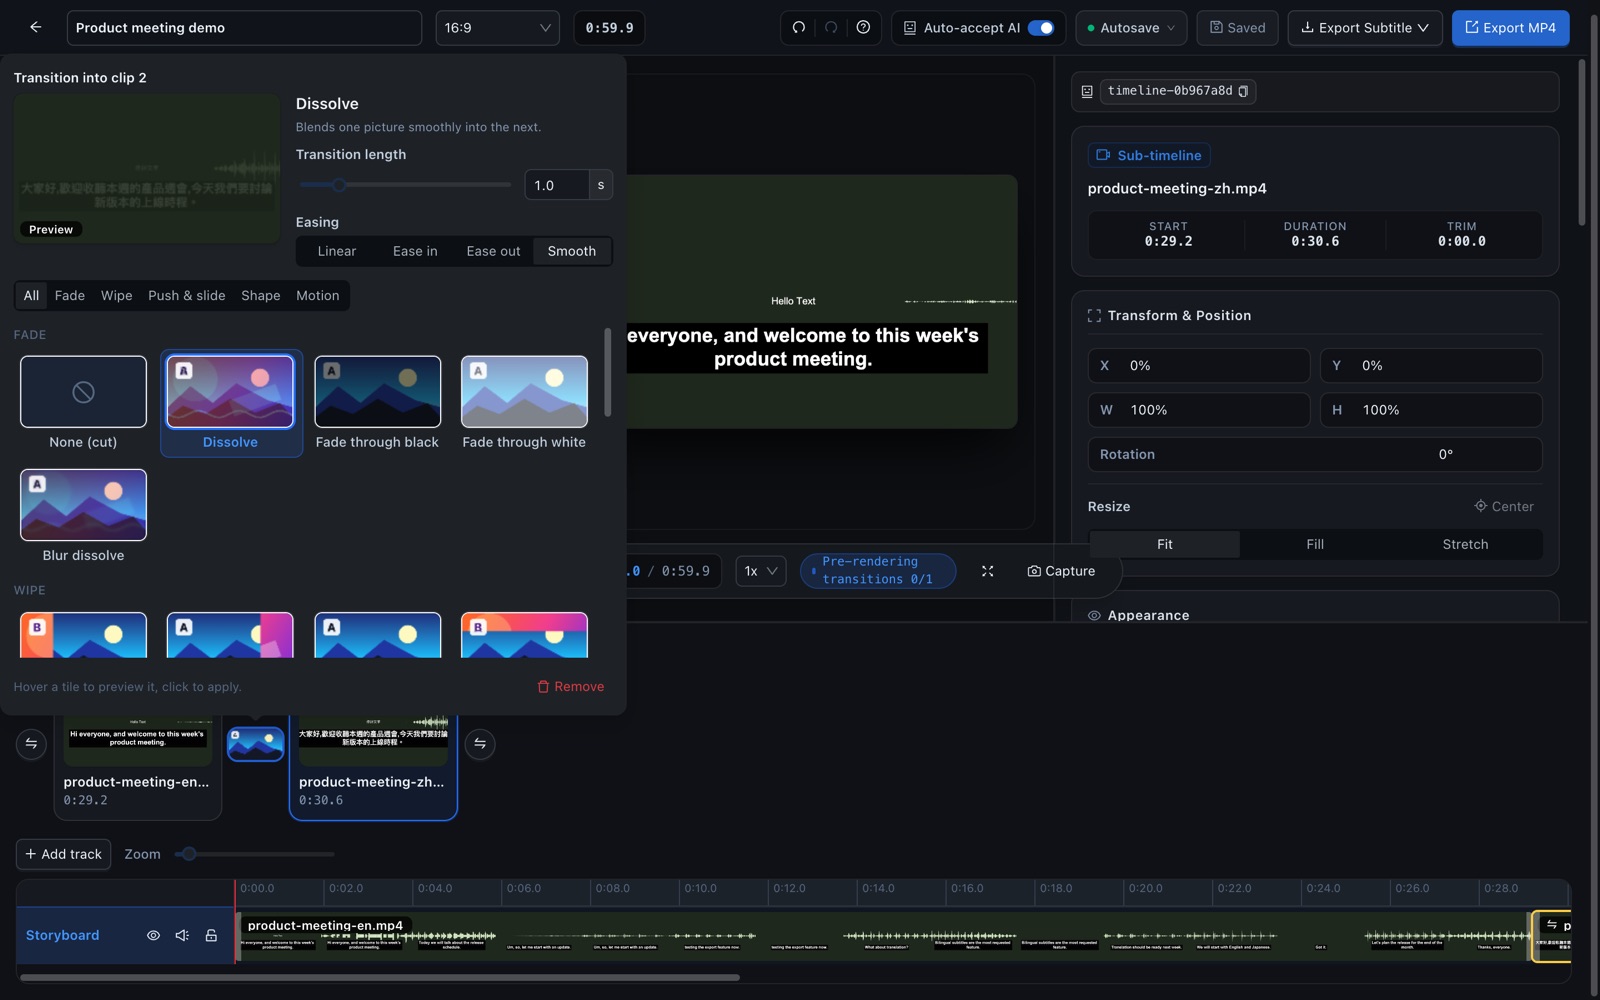
The effects come in five groups: Fade (Dissolve, Fade through black, Fade through white, Blur dissolve), Wipe, Push & slide, Shape (Circle open, Barn doors…) and Motion (Cross zoom, Spin…).
💡 If the two clips are really one video that was split, Dissolve (the two pictures slowly blending together) shows almost no change because the pictures look nearly the same. Use a wipe, push or zoom instead.
14.6 Layer images, video and music: tracks
The tracks at the bottom, from top to bottom: layers (things on top of the picture) → Storyboard (the main video) → audio (background music and sound effects).
- Add track: adds a Layer or an Audio track (up to 8 tracks).
- In the Assets tab on the left, click an asset to place it at the playback position: images, videos and motion graphics go on a layer, music goes on an audio track.
- For an animated title or chart, first pick a motion graphic template from Assets; to make your own, click Write code. The steps are the same as in Chapter 13, section 13.4 (describe it → give the prompt to an AI → paste the reply back).
- Icons next to each track name: move up / down, hide, mute, lock and remove.
- Drag a clip to move it (including onto another track of the same kind), and drag its edges to trim it.
- The Zoom slider shows the timeline in more or less detail.
14.7 The Inspector: adjust a clip
Select a clip and you can adjust it on the right:
- Transform & Position: X (left–right), Y (up–down), width, height and rotation; Fit (show the whole picture), Fill (crop to fill the frame) and Stretch (stretch to the full frame).
- Appearance: opacity (the lower it is, the more see-through).
- Speed: 0.25× is slow motion and 4× is fast-forward. With Keep duration on, the clip keeps its length on the timeline, so at 2× it plays twice as much footage in the same time. With Keep duration off, the clip's length follows the speed, so at 2× it becomes half as long.
- Keyframes (animation): a keyframe is a saved position at one moment; set two at different times and Scribis moves the clip smoothly between them. This makes a picture or clip "slowly move, grow or fade out". For example, to slide a logo from the left to the middle:
- In the Assets tab on the left, click your logo; it's placed on a layer track. Click the logo in the preview to select it.
- Move the playhead (the line on the timeline that moves during playback) to where the animation starts, click Add at playhead under Keyframes in the Inspector, then drag the logo to the left of the picture.
- Move the playhead 2 seconds later, click Add at playhead again, and drag the logo to the middle.
- Play it back and the logo slides across by itself. The ◆ button at the top left of the preview also turns keyframe mode on.
- Audio: volume. Background music can fade in and out, and with Duck under speech on, the music gets quieter automatically whenever someone talks.
- Transitions: this clip's transition in and fade out.
- Clip actions: Split at playhead (cut into two at the playhead), Merge previous / Merge next (join two neighbouring parts of the same footage back into one), and Delete.
With no clip selected, you can choose the background color (or one of the Preset Colors).
14.8 Export
- Export MP4: exports the whole scene, then asks where to save the file. You can click Cancel while it runs.
- Export Subtitle: combines the subtitles of every clip into one subtitle file.
Scenes save automatically. If you've turned autosave off, Scribis asks whether to save before you leave.
14.9 Keyboard shortcuts
The same as in the Timeline Editor (see Chapter 13, section 13.6), plus:
| Action | Mac | Windows |
|---|---|---|
| Merge with the next clip | ⌘ + J |
Ctrl + J |
| Merge with the previous clip | ⇧ + ⌘ + J |
Ctrl + Shift + J |
| Trim the start / end to the playback position | ⌥ + [ / ⌥ + ] |
Alt + [ / Alt + ] |
| Go to the start / end | Home / End |
Home / End |
Press ? at any time to see the full list.