Chapter 7: Translation and Bilingual Subtitles
Use Optimize & Translate to translate subtitles into another language, check the results line by line, then show two languages on the video and export them.
Chapter 7: Translation and Bilingual Subtitles
In this chapter we add Traditional Chinese subtitles to an English meeting video and end up with bilingual subtitles: English on top, Chinese below.
💡 Before you start: translation uses an "AI model" (think of it as the AI engine that does the translating). If you haven't set one up yet, see Chapter 6, section 6.1 first. Prefer to stay offline? Download a translation model in Settings › Models › Translation, then choose it in the AI model box (step 3 below) to translate on your own computer.
7.1 Open Optimize & Translate
At the top of the subtitle editor, click Optimize & Translate:
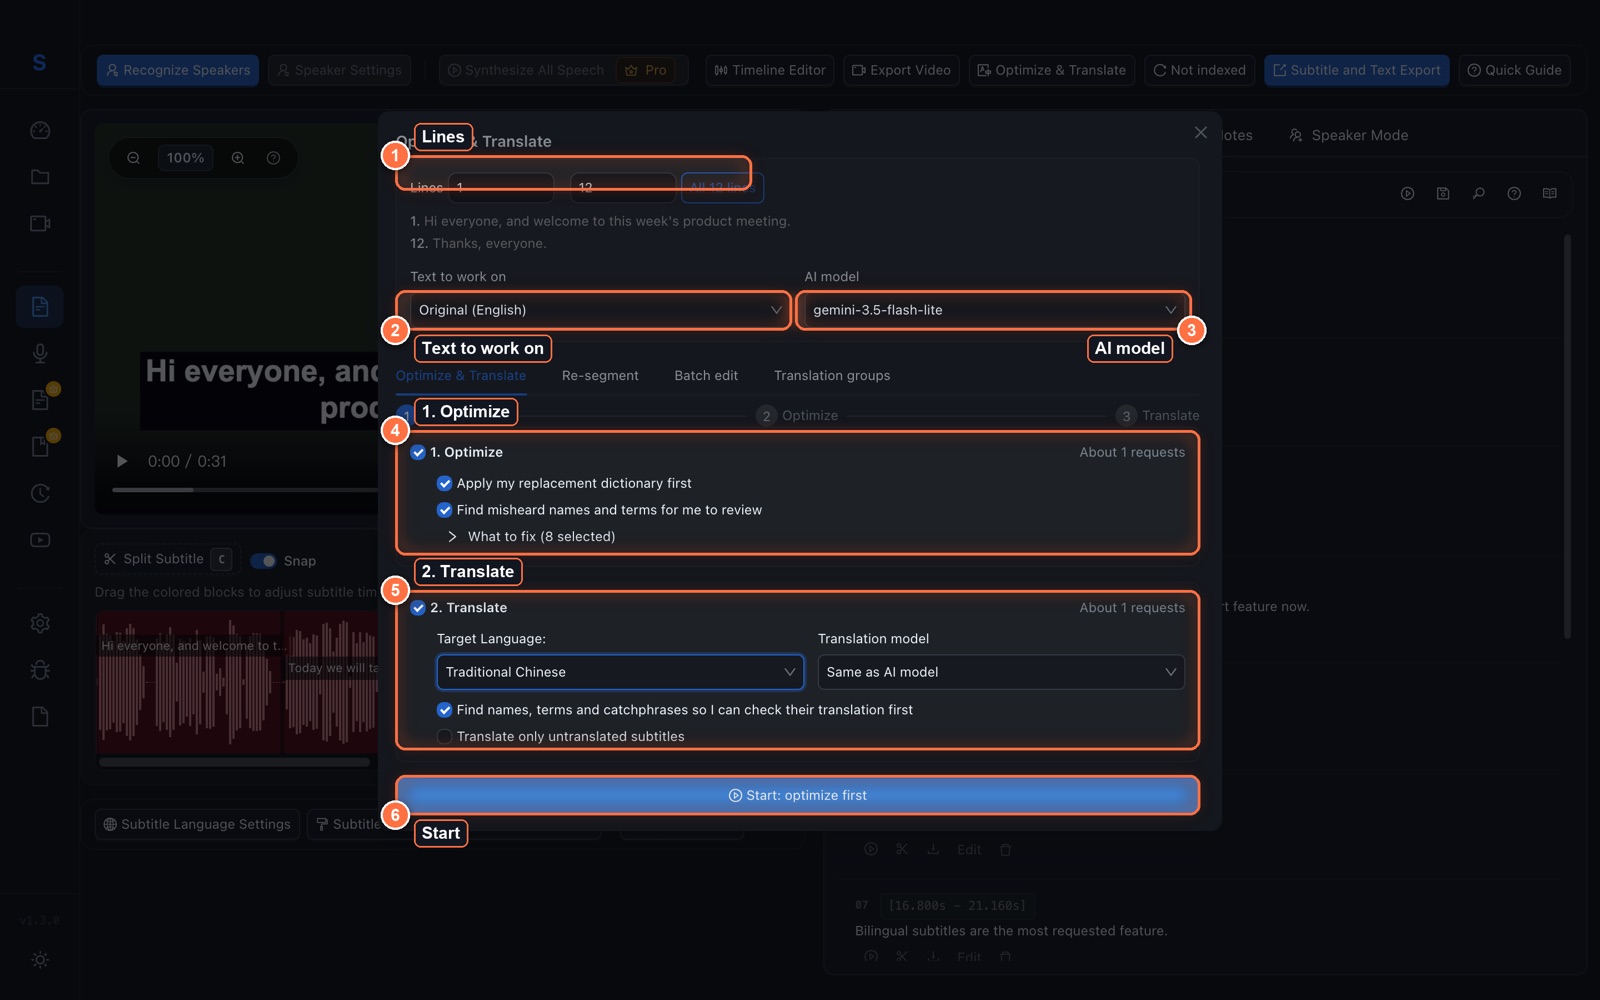
Work from top to bottom:
- Lines: all subtitles by default. To translate only part of them, enter the line numbers, for example 1 and 20 for lines 1 to 20.
- Text to work on: which text to work on. The first time, leave it on the original, which is the text exactly as it was first transcribed.
- AI model: choose a model you've already set up. This is the AI that does the translation.
- 1. Optimize (optional): AI fixes mistakes before translating. A good idea the first time; see Chapter 6, section 6.4.
- 2. Translate:
- Target Language: the language to translate into, for example Traditional Chinese.
- Translation model: keep the default, Same as AI model. It means the AI model you chose above does the translating, so there's nothing else to pick.
- Find names, terms and catchphrases so I can check their translation first: when ticked, AI shows you how it plans to translate names and special terms before it starts, so brand and people's names come out right.
- Translate only untranslated subtitles: tick this if you already translated part of the file and only want to fill in the rest.
⚠️ The target language must be different from the original. If you pick the same language, a yellow warning appears.
Click the start button at the bottom. It reads Start: optimize first when Optimize is ticked, and Start translation when it isn't.
7.2 Check the translation
When translation is done, the window lists the results line by line:
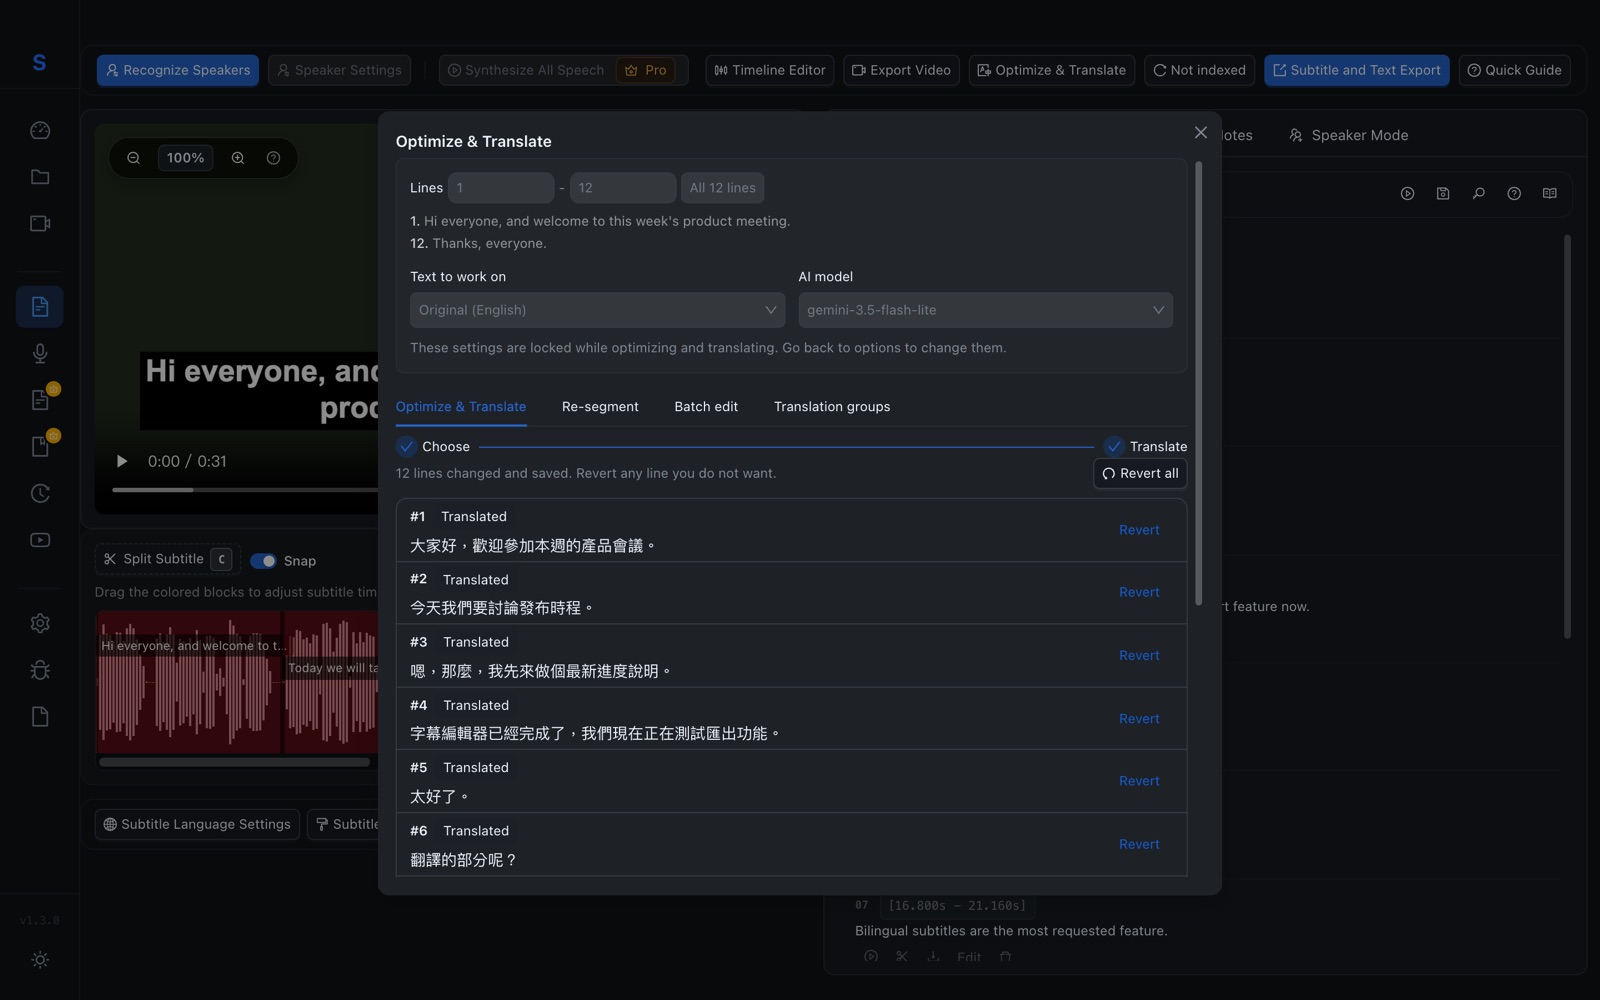
- Don't like a line? Click Revert on that line to undo its translation.
- Want to undo everything? Click Revert all.
- Want to change the settings and try again? Click Back to options.
- Happy with it? Click Done.
Afterwards, you can also edit any translation directly in the subtitle list on the right.
💡 The tabs at the top of the window also include Re-segment (re-split lines that are too long or too short), Batch edit (change text in many lines at once) and Translation groups. You won't need them at first, so feel free to skip them.
7.3 Show both languages on the video
Translations don't appear on the video until you switch on bilingual mode:
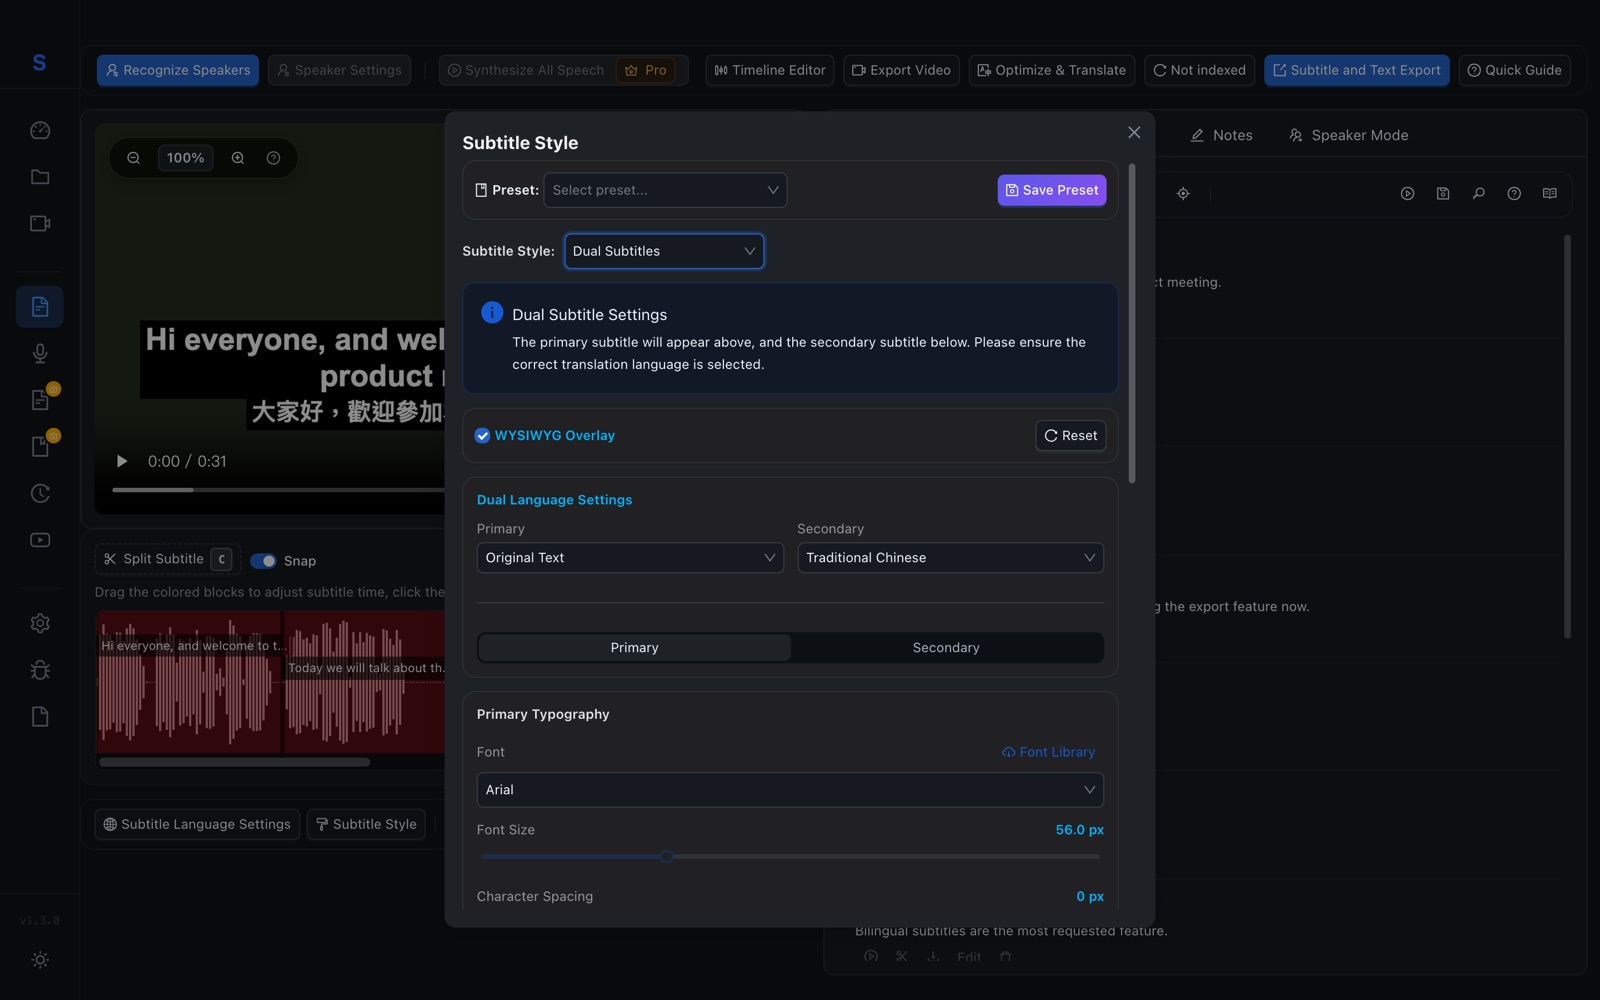
- Click Subtitle Style at the bottom left.
- Change Subtitle Style from Standard Subtitles to Dual Subtitles.
- Under Dual Language Settings:
- Primary (the top line): choose Original Text (the language spoken in the video, English in this example).
- Secondary (the bottom line): choose the translation, for example Traditional Chinese.
- Use the Primary / Secondary tabs below to set the font, size and color of each line separately. For example, white for the top line, yellow and a little smaller for the bottom line.
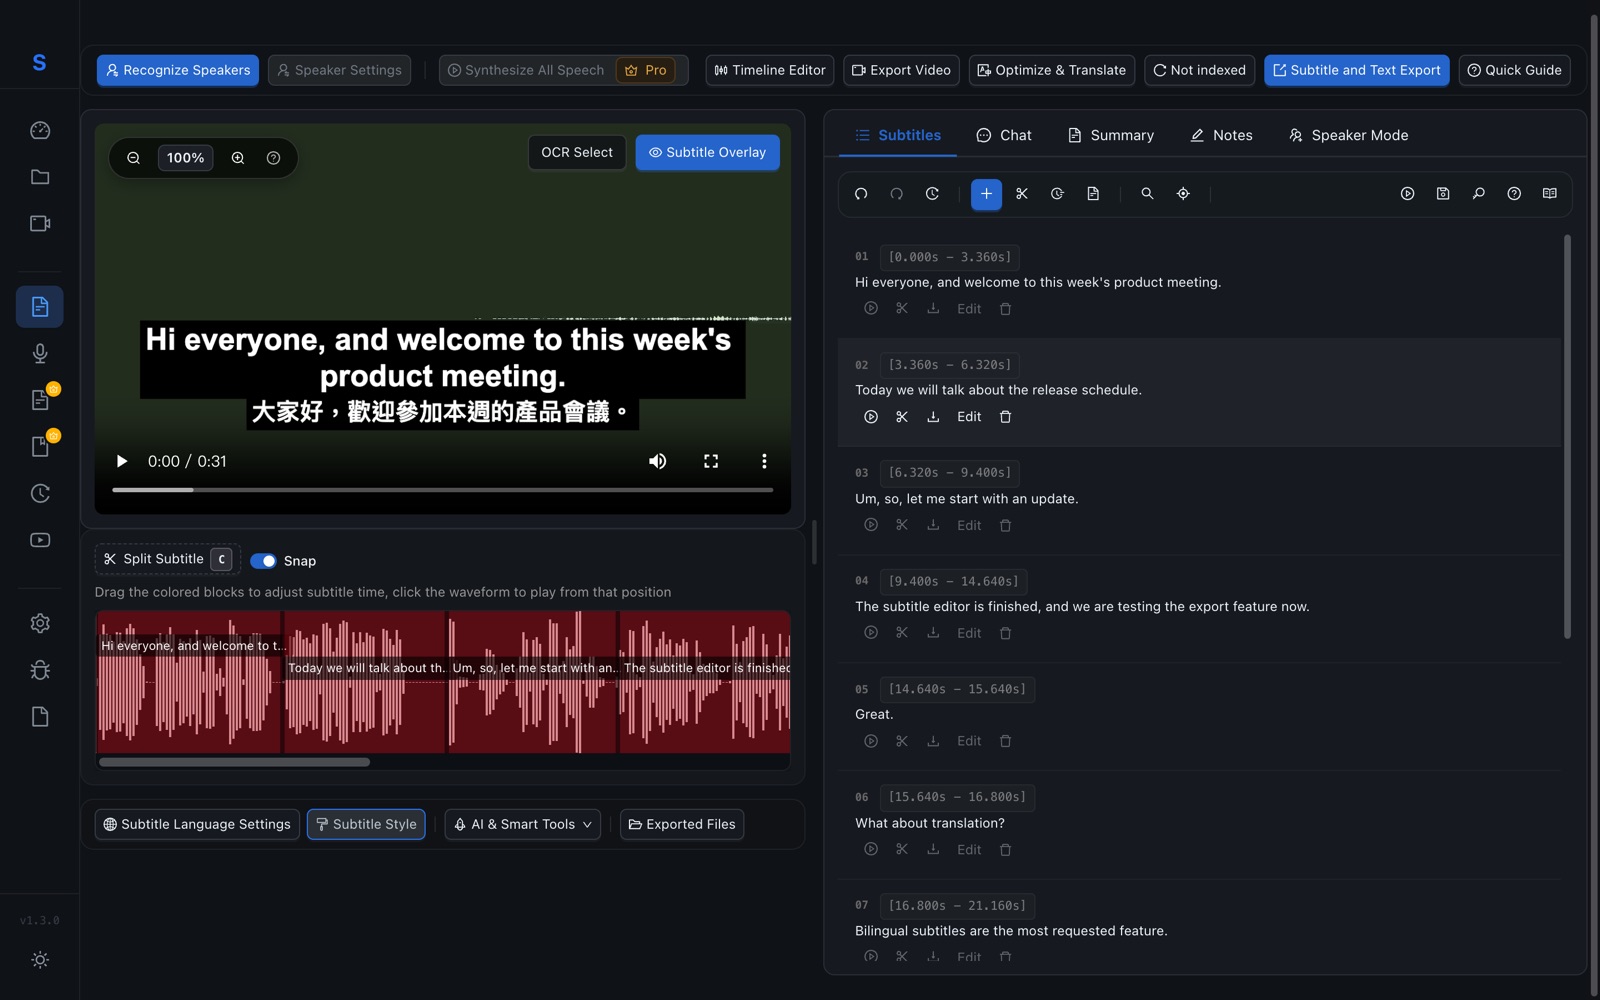
Close the window and the video preview shows both languages:
7.4 Export bilingual subtitles
Click Subtitle and Text Export at the top right:
- Dual SRT (bilingual subtitle file): one subtitle file with both languages in every line. SRT is the most common subtitle format; YouTube and video editors can all read it.
- Video with Burned-in Subtitles (MP4): exports a video with both languages on screen, styled just like the preview.
- Only need one language? Choose SRT or another standard format.
See Chapter 4, section 4.6 for details on every format.