Scribis Single-File Transcription Tutorial: Language, Local Models, and Prompts
Import audio or video, choose a language and local ASR model, add terminology prompts, then review and organize the transcript.
Single-file transcription in Scribis is useful for an interview, lecture, or video. Import the source, choose a language and recognition model, and add terminology prompts when needed. If this is your first time, try a short recording before working on the full source.
1. Prepare and import a source
Make sure the audio or video plays, then choose whether to use local or cloud recognition. For confidential material, check that the selected service's data handling fits your needs.
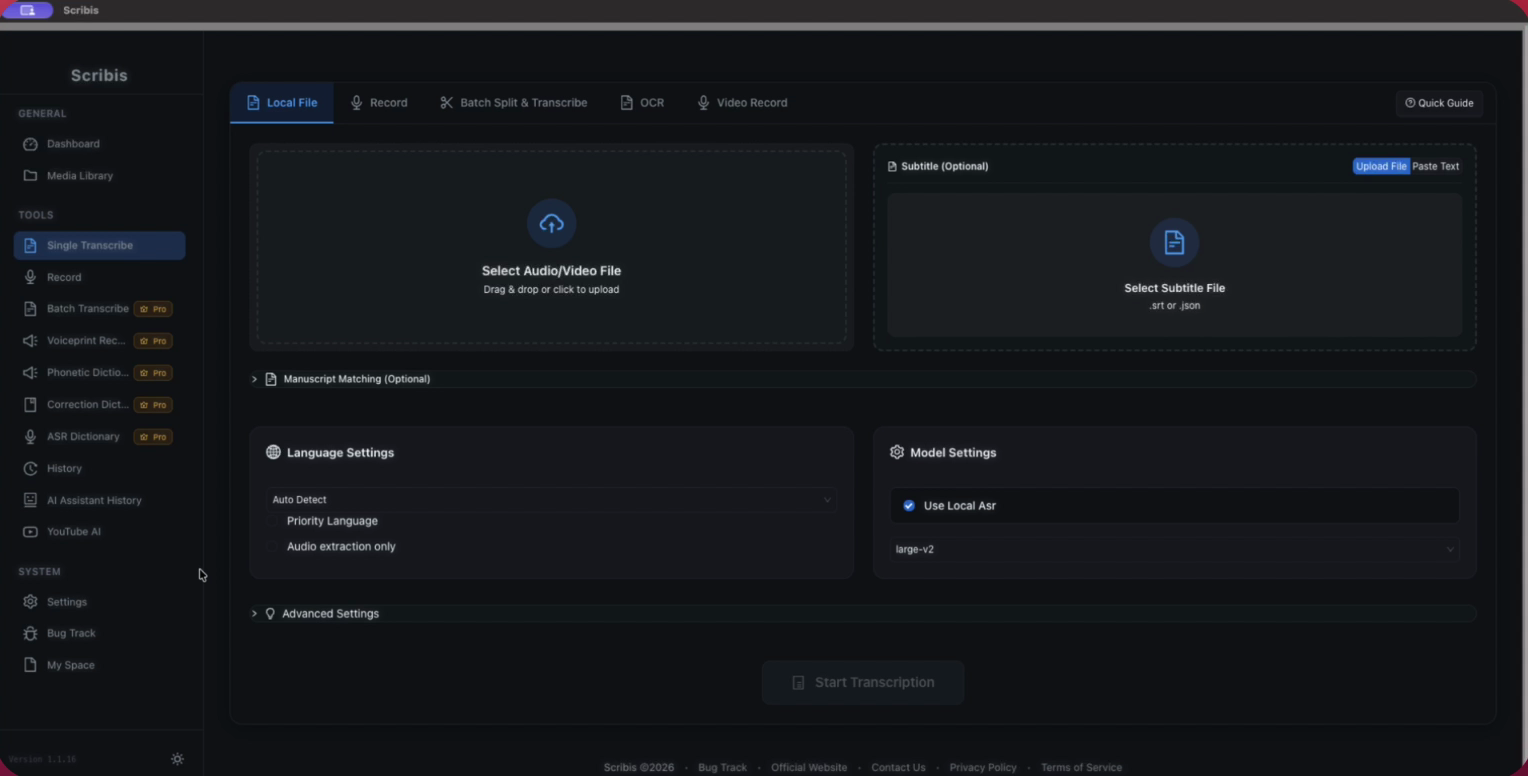
Select Single Transcribe in the sidebar, then click Local File to choose audio or video, or drag a file into the import area. If you already have SRT or JSON subtitles to compare against, add them under Subtitle (Optional) on the right. Otherwise, leave that area empty. Select Audio extraction only only when you want to extract a video's soundtrack without transcribing it.
2. Choose a language and recognition model
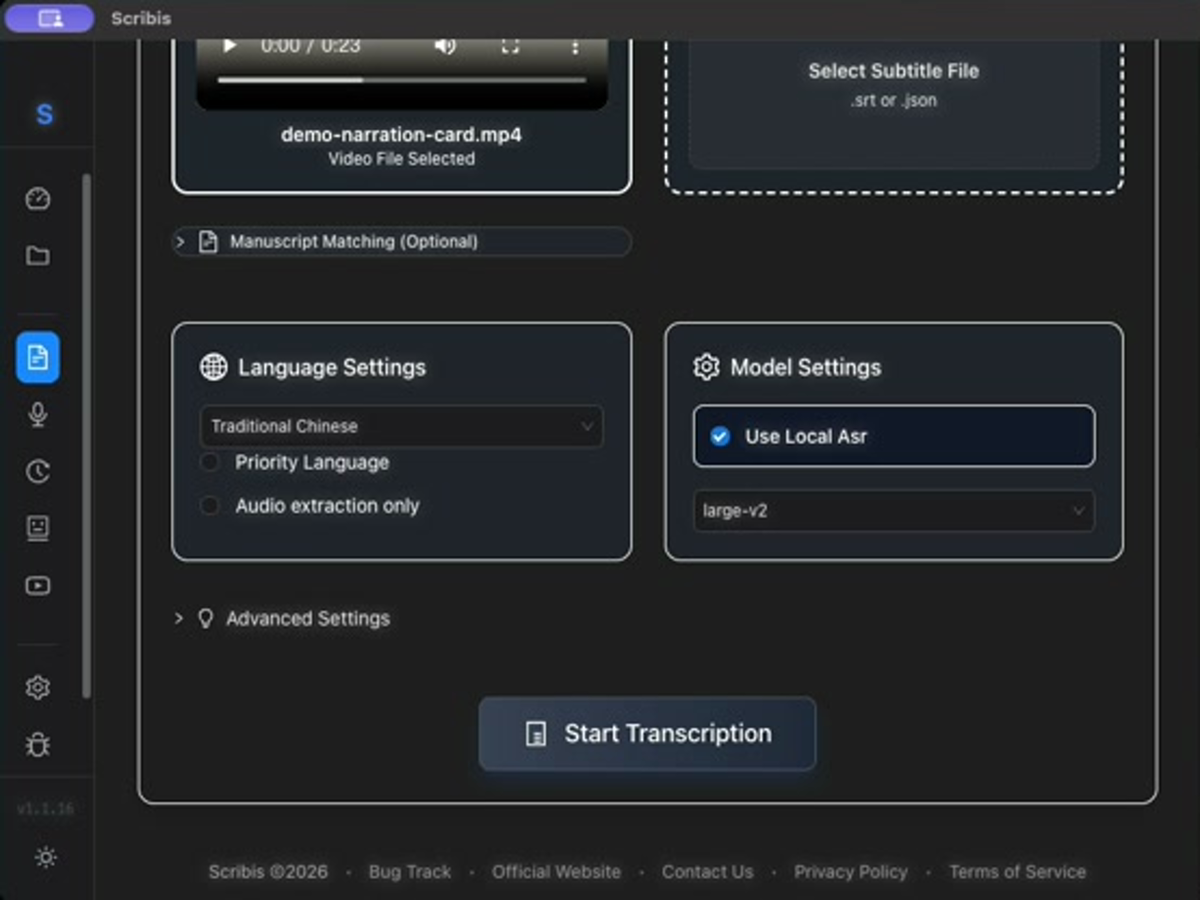
When you know the language, select it directly. For Traditional Chinese audio, for example, choose Traditional Chinese. Try Auto Detect or Priority Language when the source switches between languages.
For a local model, enable Use Local ASR and select an installed model. The screenshot uses large-v2; available options depend on the app version and installed resources. Try a short section first to compare recognition quality with processing time.
3. Add prompts when useful
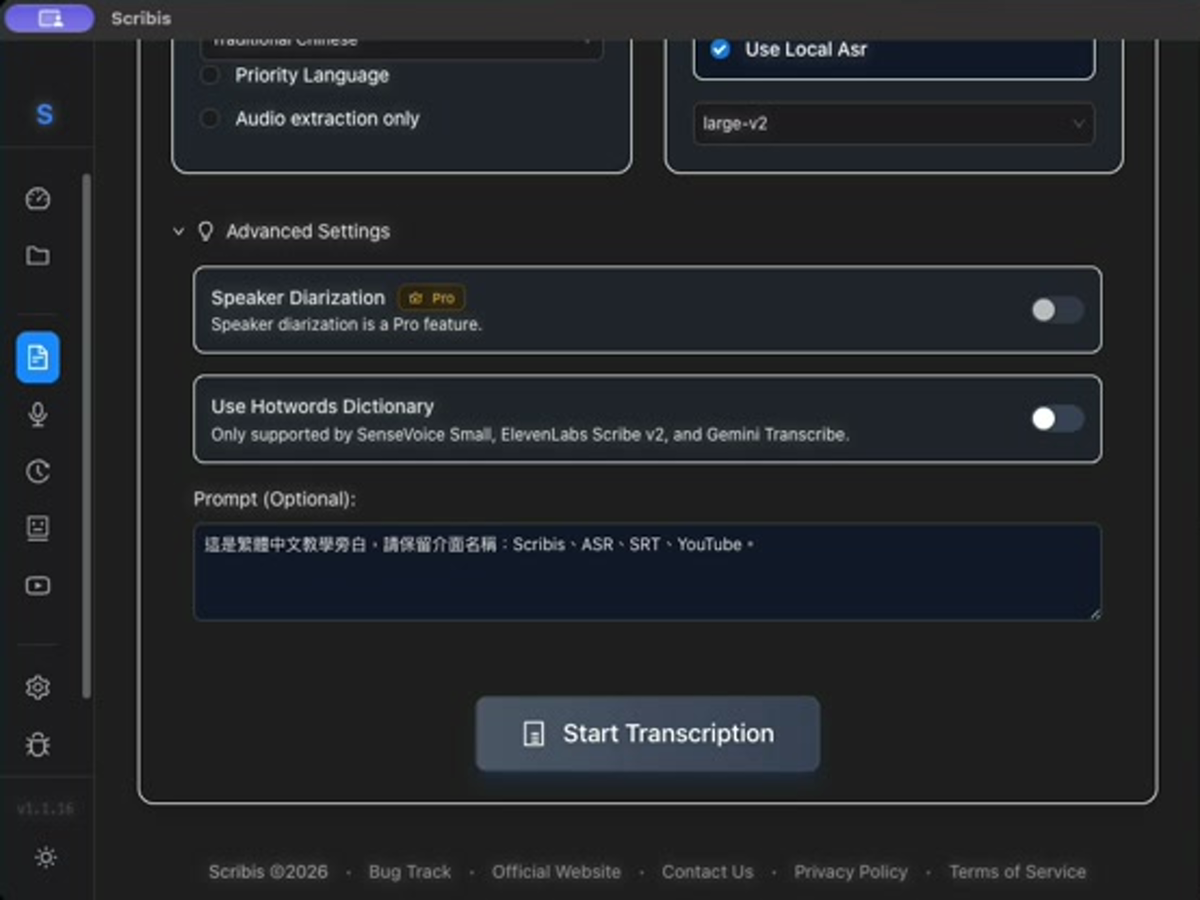
Expand Advanced Settings. In the Prompt field, list a few important names, product terms, acronyms, or details about the subject. For example: “This is Traditional Chinese tutorial narration. Preserve these interface terms: Scribis, ASR, SRT, and YouTube.” Prompts provide recognition hints; review specialized terms in the transcript afterward.
For a conversation with several speakers, enable Speaker Diarization if needed. This feature requires Pro, and you should still verify the speaker labels. Use Hotwords Dictionary works only with the specific models listed in the app, so leave it off when the selected model does not support it.
4. Transcribe and review the result
Confirm the source, language, and model, then click Start Transcription. When the task finishes, open the transcript and play the source. Check names, company and product terms, numbers, negations, and places where speakers switch languages. Replay edited passages to confirm the text and timing match the audio.
For subtitles, refine the line breaks and timestamps, then export in the format your project needs. Reopen the exported file and spot-check that the text is complete and the timing stays in sync with the video. Have someone familiar with the material review important interviews or subtitles intended for publication.
Settings depend on the source and model. Try a short section first, then use the settings that suit the longer recording; this also helps you estimate how much review it will need.