Scribis Batch Transcription Guide: Add Files, Manage the Queue, and Sync Folders
Add multiple audio or video files in Scribis, apply shared model and language settings, and follow queue progress and failed items.
When you need to process several interviews, classes, or meetings, batch transcription puts the files in one queue and lets you follow each item's status. It works best for files with similar formats, languages, and recognition settings. Split work that needs different settings into separate batches.
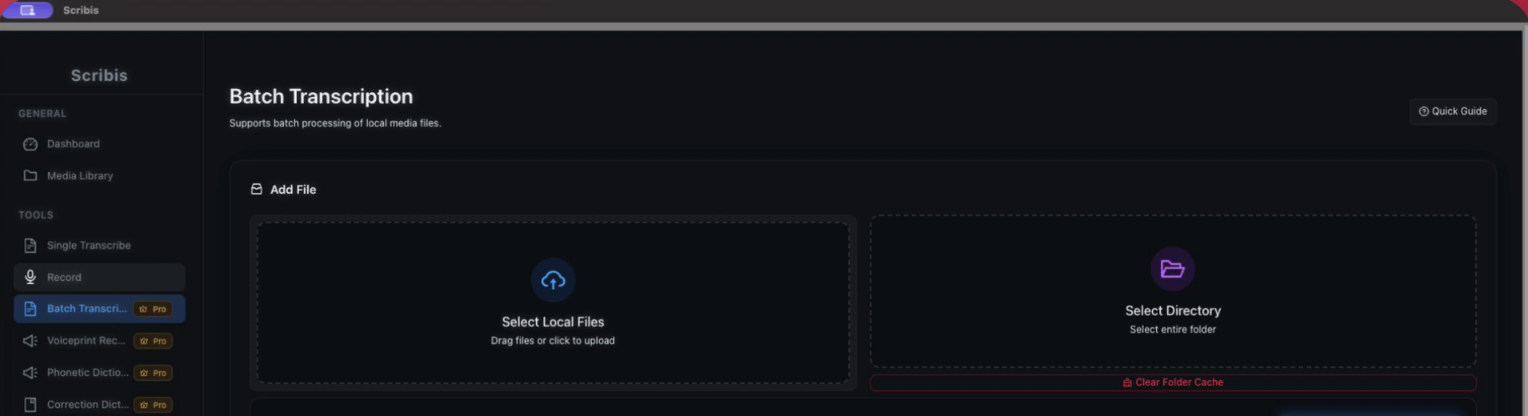
1. Prepare the files
Make sure each file plays and use filenames that identify the date, session, or speaker. If a folder contains videos you do not need to transcribe or duplicate files, clean up the source first so they are not added to the queue by mistake. For private or client material, confirm that you are allowed to use the selected local or cloud recognition method.
2. Add multiple files
Open the Batch Transcription page. Drag in multiple audio or video files, or use Select Local Files to add several items at once. If the files are already organized by project, you can also select a folder to import supported media files. After importing, check the filenames and count before starting.
The batch queue also checks for items that have already been processed or are duplicates. If an item is skipped, confirm its filename and source. A filename alone may not tell you whether two files are actually the same.
3. Set the language and model for this batch
Batch settings apply to the files in the current queue. Choose a local model or a configured cloud model, then set the source language. If all files use the same language, select it directly. For mixed-language material, try a short sample first to see how automatic detection performs. Splitting files with different languages or purposes into separate batches makes results easier to review.
If you need translation, first confirm that the translation service and target language are configured. Available models, translation services, and some advanced options vary by app version, operating system, and license. Set only the features this batch needs.
4. Start the queue and handle unfinished items
After you start, files enter processing in sequence. Follow each row's waiting, processing, complete, or failed status. Processing time for long files depends on the model, hardware, and file length. Completed results appear in the media library, where you can open and review them one by one without waiting for the entire batch to finish.
If an item fails, read its message and check that the file plays and that the language and model are compatible. Remove that item and retry it after correcting the settings if needed. Avoid repeatedly resubmitting the entire batch because of one file.
Optional: Sync an authorized folder
If your version shows a Folder Sync section, choose a folder and authorize Scribis to access it, then scan or sync to add new media. On macOS sandboxed builds, you may need to select the folder again if access expires. Check the path and file scope before syncing so unrelated private files are not added to the queue.
Before processing a batch
- Confirm that the files play and their filenames identify the source.
- Keep files with similar languages and processing needs together.
- Make sure the local model is ready or the cloud service is configured.
- Confirm the translation service and target language if needed.
- Test the settings with one short file before starting a large batch.
Batching saves repeated setup; it does not replace transcript review. For important interviews or published subtitles, compare each transcript with the original audio and check names, numbers, timestamps, and translation meaning.